How to Grout Mosaic Art?

Mosaics are a pure form of art, it brings so much beauty to a space, but making a mosaic piece and knowing how to protect it is important. For you to fully enjoy your precious mosaic work, you must set a good preparation for it and grout it for protection. Preparation of the background (surface) is such an essential step that allows the final adjustment of tiles that enable the grout to take place.
What is Grout?
Grout is the material that brings the tile mosaic pieces together. Grouting is the act of filling the gaps or the indices between the mosaic tiles. It is the product that is used to fill the gaps between the handmade tesserae to enhance the overall look of the piece for a tiled surface and a more attractive settled finish.

What is the Relationship Between Mosaic and Grout?
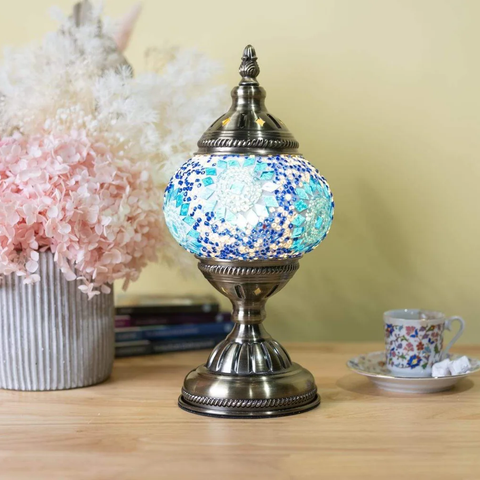
If you use mosaic tiles for a mosaic project, such as a table mosaic lamp, you will need to grout your mosaic piece. Grouting in mosaic work is essential for it to be secure and durable.
Choosing the mosaic project you want to do and the base where you will place your tiles' layout is the first step of the mosaic DIY journey. Regardless of the type of project you choose, it can be a small side table, birdbath, mosaic lamp, or maybe even an old chair; after adhering tesserae and allowing setting time, you will want to apply your grout as a final step.
Mosaic tile grout is where the piece starts to come together and how you will grant protection for your dazzling mosaic designs. After putting all of your colourful tile pieces together and the glue has dried, grout comes as an adhesive layer to finish up the plan, ensuring it stays clear of dirt, and moisture.
Why Should You Grout Your Mosaic Art?
The grout is used to secure the mosaic material in place. Regardless of the size of the tiles or if it's indoors or outdoors, you will have to protect the art you make and preserve it as much as possible in the best condition possible. Using grout lies in strengthening the mosaic, filling the joints, and essentially making several small pieces, one more significant vital part; it also can provide more durability while putting a more crisp and clean appearance to your mosaic art.
Without grout, unwanted elements can get in between the tiny space of the tiles that behave like a magnet waiting to draw debris resulting in the mosaic rapidly deteriorating into a noticeable disfigurement. Groutless mosaic tiles have a higher chance of breaking, meaning you must resume your work repeatedly.
However, you do need to choose your grout carefully. Mosaic tiles are smaller than other tiles and require grout that won't damage the surface when applied. If you choose to go with a DIY mosaic set, you can order the pack with the right plastering material; you will get the proper grout and the entire plastering kit with a detailed instruction guide that will take you through your entire DIY mosaic journey.
Step by Step Mosaic Art Grouting
Awesome! You choose your DIY mosaic project, and you got your piece ready; then, let's go into the most fun yet important part: grout your mosaic. Remember that grout is essential for your mosaic; it can make or break it. So, it is essential to learn how to grout, when to grout, choose the suitable grout, mix it, and clean it up. Once you know about these details, you are on your way to enjoying mosaics even more. Let's check the steps to grout your mosaic piece correctly.

Prepare
First, you must start by preparing all the materials you will be working with. You will need the following:
- Powered grout,
- Water,
- A container,
- A stirring tool,
- A spreading tool,
- Foam sponges,
- Soft cloth,
- Newspaper to spread over your working area,
- Bucket with water to rinse out the foam sponges.
Spread newspaper over your workspace. Assemble your tools and supplies.

Grout Mixing
After preparing your working area, you can start mixing your grout. Add the powder to the cup, then pour a small amount of plaster powder onto the water while stirring solidly for the texture to thicken.
You can follow the measurement according to the package directions when you get the DIY set plastering kit. Mixing your grout the right way is very important to avoid any cracking or shrinkage of the grout. Too little water can be powdery and too hard to spread, and too much water can make the grout lines shrink or crack.

The kit includes plastering put-making and disapproval gloves to protect your hands from the hard material.
Scooping
Scoop a generous amount as a fine texture to fill in the spaces between your mosaic pieces. Grab a significant amount of the plaster and apply it to your base; scrape off the excess plaster with a few fingers and wipe it back into the base.
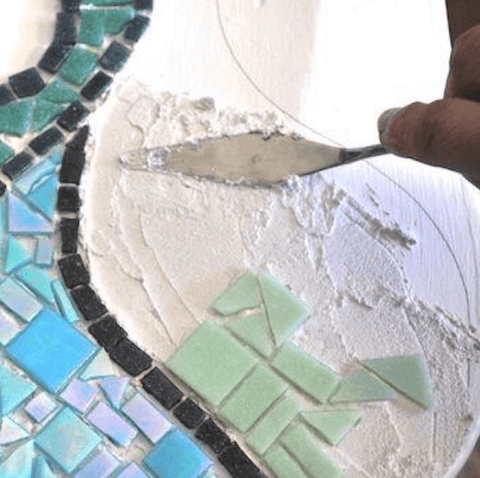
Spreading and Smoothing
Spread the grout across your surface and ensure all spaces between tiles are filled. Ensure your grout is spread evenly across all surfaces and, most importantly, in all the holes and notches.

Then the smoothing part comes; this is the least complicated step. You all have to grab a glob of grout and mush it into the mosaic. Keep doing this process until all areas of your canvas have been covered in grout.
Before you haze the grout, you must ensure that all the cracks are filled. Look closely and ensure that there is no fizz between the grout.
Cleaning
Using a wet sponge, clean the excess grout from the sides of your canvas. Wipe down, going over the surface in both directions and rinse the sponge often from top to bottom. Repeat the process, removing only a little grout from the gaps. Let it set, then buff it out with a soft cloth.

After you finish cleaning, voila – you will have a shiny nice mosaic piece that is well-grouted and protected. Watch the video for more detailed assistance: https://www.youtube.com/watch?v=_M5mJGlzImY

Final Notes on Grout
Regarding plastering, there are no specific requirements for the type of grout you would use for a mosaic. The one thing that the expert recommends regarding the kind of grout you would use for a mosaic project is to avoid using cement-based grout. This grout is highly susceptible to staining, cracking, and absorbing water, which can cause the growth of rotting and other fungi, and doesn't hold up well in moist environments. You want to use something different than cement-based grouts on a beautiful mosaic project.
You can get suitable grout on our website with all the sets. Also, you can choose which mosaic project you want to create with tile colours and the entire set. Now that you have all the tools your need and the guidance, you can enjoy DIY mosaic art with your loved ones for your home or as unique gifts for those who matter the most to you.
You can read our previous article at https://artmasterclassmosaic.myshopify.com/blogs/news/5-diy-projects-you-can-do-in-your-free-time.